To withdraw money from Exness, open Withdrawal in your Personal Area and select a method available to your account. Enter the amount and your own receiving-account details, review the request and complete the required security checks. Follow any additional instructions, save the reference and track the request in Transaction history.
Submission, processing, platform completion and credit to the receiving account are separate stages. The request record helps you follow the withdrawal through to the receiving provider. Approval and receipt are not guaranteed.
Video reference
Scope and requirements
Available methods depend on your registered region, account verification status and payment-provider availability. Only methods displayed in your live Withdrawal tab are available for that transaction. A listing under Deposit does not establish withdrawal availability. See Exness's available payment methods.
The country, contracting entity, account type and currency are unspecified, as are the device, app or browser version, interface release and screenshot capture dates. Menu labels and field order are illustrative. The screenshots contain masked or sample details; they do not establish a live payout or current account conditions.
Before starting:
- Complete the Exness verification required for payment transactions and any requested payment-account ownership checks.
- Use a receiving account you own, registered to the exact full legal name matching your Exness registration. Third-party payments are prohibited.
- Check the source trading account's free margin and the selected method's limits.
- Make sure you can access your configured confirmation method.
Exness states that a withdrawal using an unverified bank card without prior deposits will be rejected, and card verification will be requested before withdrawal use. This condition does not apply to every payment route. See the general withdrawal rules and payment-account verification information.
Compare the methods available to your account
Check each live method card and its FAQ for required receiving details, currencies, payment-provider fees, transaction limits and processing estimates. Exness describes these estimates as the average to maximum predicted time. They do not guarantee an arrival time. See Payment method information.
The following routes are examples. Use one only if it appears in your own Withdrawal tab.
| Example route | What to check before selecting it |
|---|
| Bank card, bank or local payment route | Required recipient details, ownership checks, currency and route-specific instructions. |
| Skrill or Neteller | Withdrawal availability and the identifier requested for your own wallet. The historical Skrill demonstration below uses a login email. |
| BTC, ETH or a USDT route | The asset, exact network and receiving details requested by the live route. |
| Binance Pay | The recipient identifier requested by that payment flow. Keep recipient-ID fields distinct from blockchain-address fields. |
Minimum transaction amounts vary by method and are assessed after conversion to the account currency. Some methods also impose daily, weekly or monthly maximum amounts. A request within the per-transaction range can therefore exceed a period limit. Check the live notices and method conditions.
Exness reserves the right to investigate, cancel or impose fees or charges on withdrawal requests from trading accounts with no trading activity. The rule is discretionary and establishes no automatic outcome or specific charge. If it affects you, ask support how the rule applies. Do not place an unwanted trade simply to attempt a withdrawal.
Submit your withdrawal in seven steps
1. Open Withdrawal and choose an available method
In your Personal Area, open Payments & wallet, then Withdrawal, or use the equivalent Withdraw option in your layout. Check the live method card before selecting a route. Exness's withdrawal procedure starts with choosing an available method in Withdrawal. Its availability guidance explains why the selection can differ between accounts.
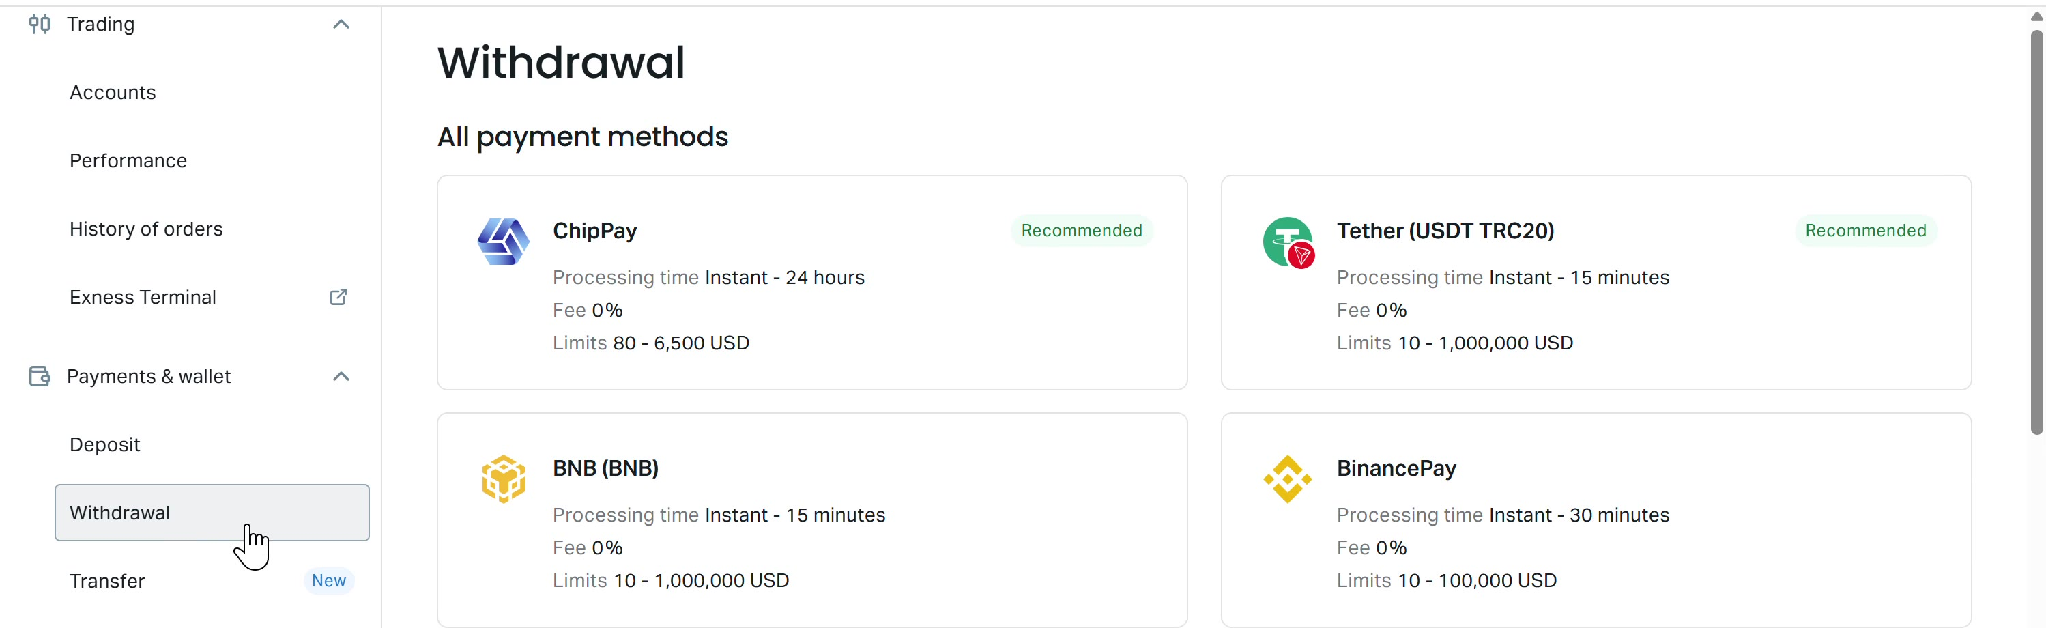
Figure 1. Historical demonstration screenshot; capture date unverified. Displayed fees, limits and processing estimates are example-specific. Check the methods and conditions shown in your live Withdrawal tab.
The menu is a demonstration. Its fees, limits and time estimates apply to that example; use your live card for your request.
2. Select the source account and enter the amount
Choose the trading account you intend to withdraw from. Check its currency and the amount's unit before continuing. The maximum withdrawable amount at a given time equals the account's free margin, and payment-method limits also apply. The full displayed balance may therefore differ from the amount available to withdraw. See the general withdrawal rules.
The Skrill demonstration shows separate source-account and amount fields. Their arrangement is illustrative. Exness's general procedure requires an amount and trading-account selection, but the steps can vary by method.
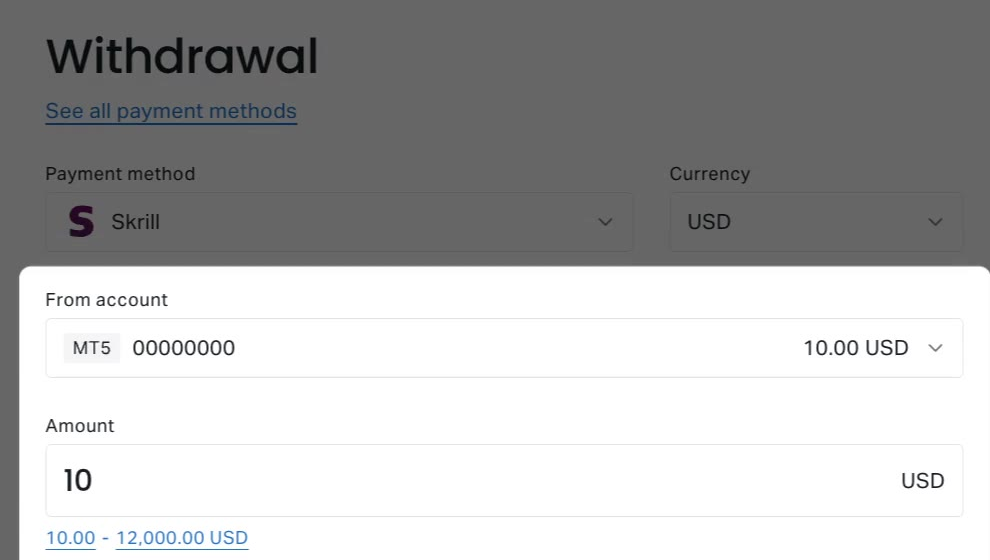
Figure 2. Historical demonstration screenshot; capture date unverified. Source-account and amount fields are shown separately. The amount is illustrative, and the current layout may differ.
Use your own account and intended amount. The displayed amount is an example.
3. Enter your own receiving-account details
Complete the fields requested by the selected route. In the historical Skrill walkthrough, the receiving-account screen asks for the email used to log in to the recipient's Skrill account. This does not establish the current Skrill interface. Follow your live form and its instructions.
The receiving account must belong to you and be registered to the exact full legal name matching your Exness registration. Entering an email or another identifier does not complete a separate ownership check. See Exness's general withdrawal rules.
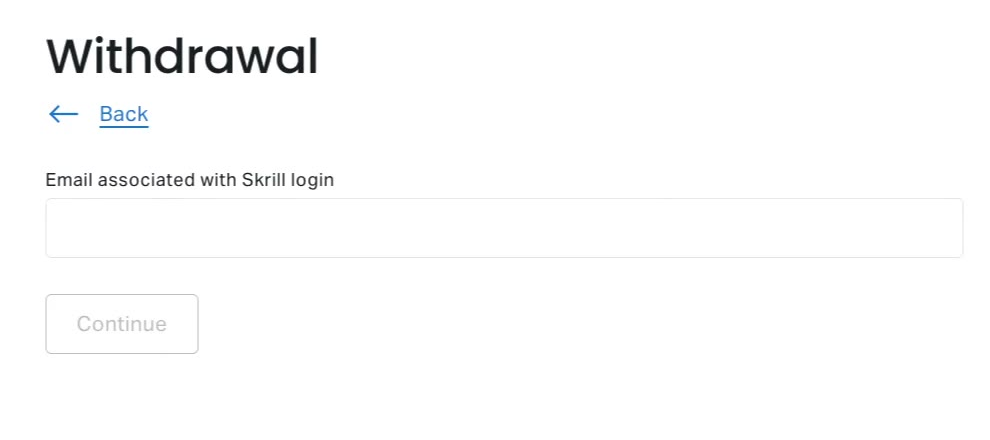
Figure 3. Historical demonstration screenshot; capture date unverified. This example requests the receiving Skrill account’s login email. Follow your live form and use your own correct details; the current interface is unverified.
The recipient-email screen is a demonstration. Enter your own correct details; do not copy the sample information.
4. Review the request before confirming
Check the displayed details against your intended withdrawal:
- Receiving destination or identifier.
- Source trading account.
- Currency, amount and units.
- Any displayed fee and expected received amount.
- The selected route's current conditions.
Correct any discrepancies before choosing Confirm. Fields vary, but review and confirmation are part of the official withdrawal procedure.
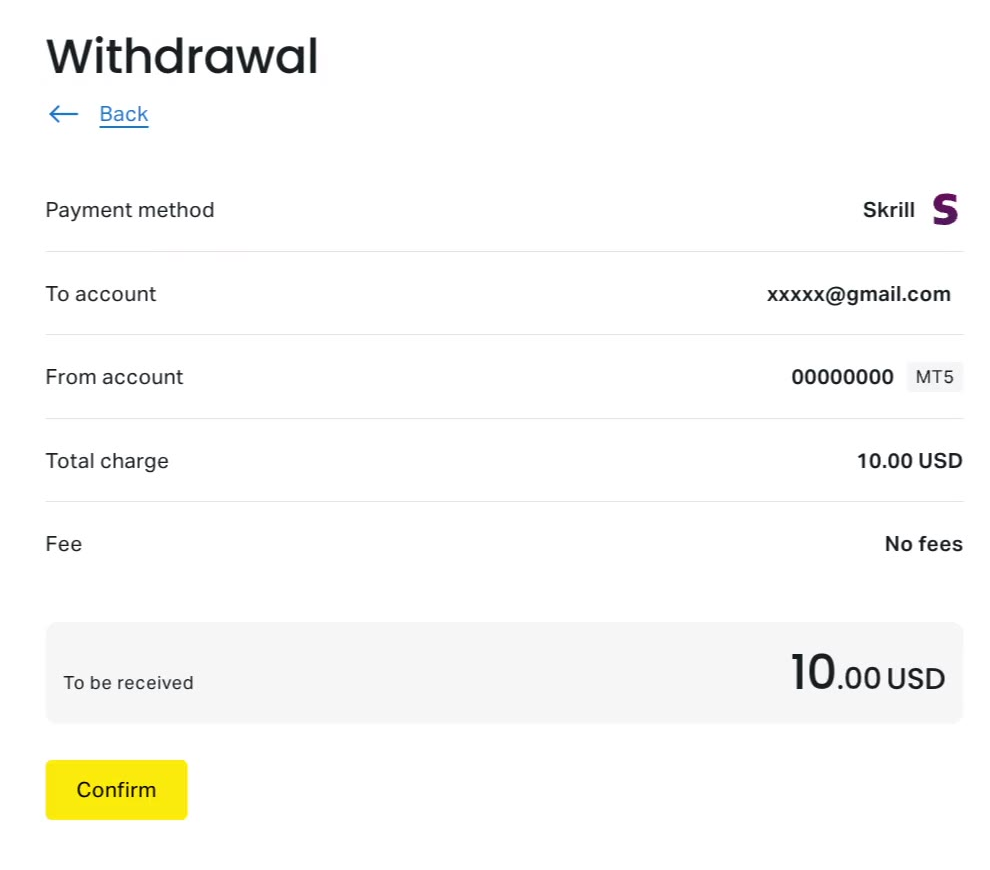
Figure 4. Historical demonstration screenshot before security confirmation; capture date unverified. The sample amount and “No fees” label do not establish your withdrawal fee or received amount.
The review screen contains sample details. Its amount and "No fees" label do not establish the fee or received amount for your withdrawal.
Follow the prompt for your account's current security type. Documented methods include email or SMS codes, push notifications and an authentication app. Push notifications require the Exness Trade app. Every method may not be available to every account at the withdrawal screen. See Security types and the withdrawal confirmation procedure.
Keep confirmation codes private and use the prompt associated with your request.
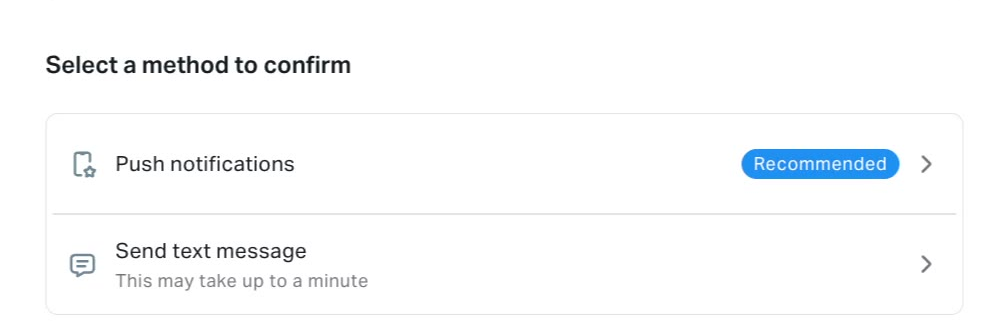
Figure 5. Historical demonstration screenshot; capture date unverified. This example offers push notification or SMS confirmation. Your actual prompt depends on your configured security method.
The demonstration offers push notifications or a text message. Your configured security method determines your prompt.
6. Follow any additional provider instructions
Complete any remaining fields or actions shown by your selected route. Exness's general instructions allow for additional steps, whose content and order vary.
The historical Binance Pay walkthrough includes a subsequent recipient-ID page labelled BUID. It does not establish the current interface. Follow the live field instructions and do not enter a blockchain address in a recipient-ID field.
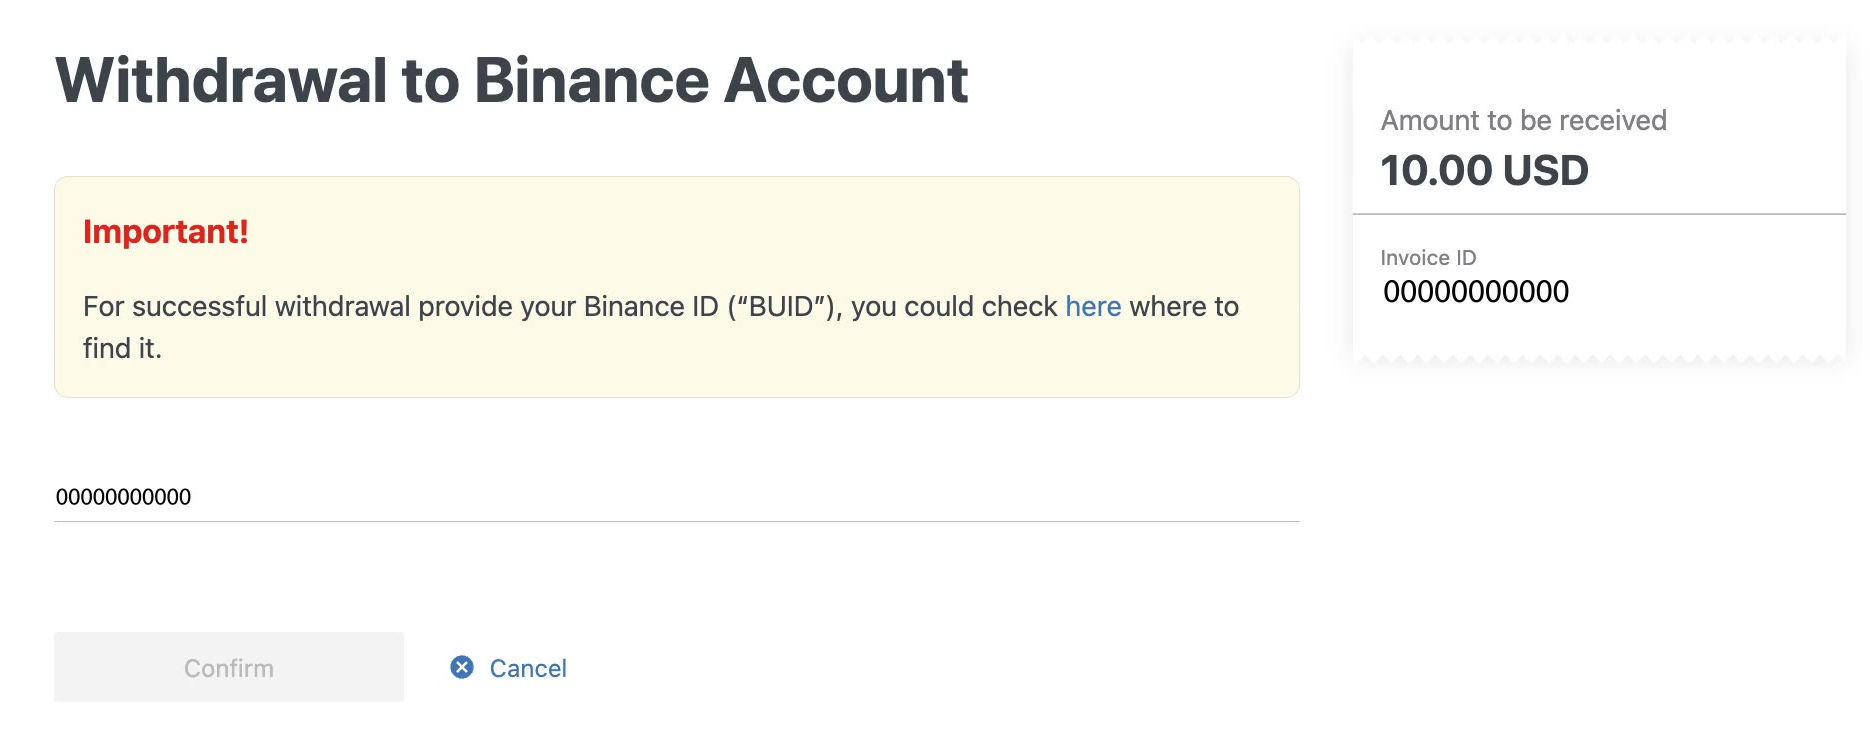
Figure 6. Historical demonstration screenshot; capture date unverified. This example includes a separate Binance recipient-ID step. Zero-filled identifiers are placeholders, not usable destinations or proof of receipt; follow the live field instructions.
The zero-filled identifiers are sample details. They cannot be used as a destination and do not document receipt.
7. Save the request record and open Transaction history
Save any generated invoice or reference, submission time, method, source account, amount, currency, recipient identifier and relevant confirmation or error messages. Keep the record private and mask sensitive details before sharing screenshots publicly.
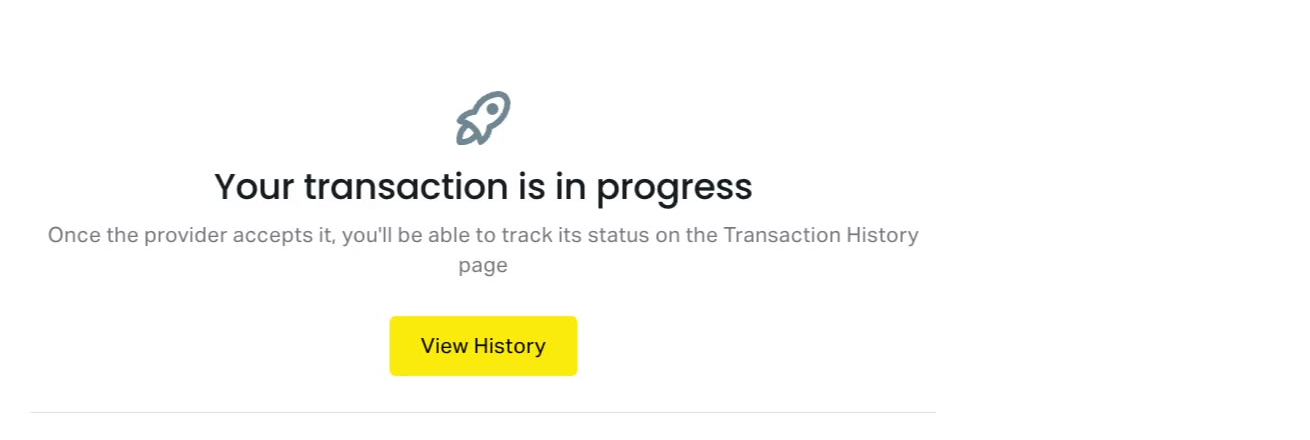
Figure 7. Historical demonstration screenshot; capture date unverified. The in-progress message does not confirm credit to an external account. Check Transaction history and the receiving provider’s record.
The walkthrough ends with an in-progress message. It does not document credit to an external account.
Open Transaction history and select the relevant withdrawal. Exness says the transaction summary includes an invoice ID and a detailed timeline. Its documented statuses are Processing, Done and Rejected. See the transaction-history guidance.
If the form failed before submission, there may be no invoice ID. Save the exact error and its time, then check history before retrying. Compare any recorded withdrawal with the receiving provider's record. Submission or an in-progress screen does not prove receipt.
Additional checks for an available crypto route
Check whether an internal stage is required
Follow this branch only if your available route requires it. The USDT walkthrough shows "MT to Wallet (internal)" before a separate external withdrawal. The supplied official guidance does not verify that particular wallet sequence. Follow your live route's funding instructions; the example does not establish a mandatory step for every crypto withdrawal.
Exness documents transfers between trading accounts as separate operations in its Payments & wallets guidance. An internal move does not establish receipt by an external payment account.
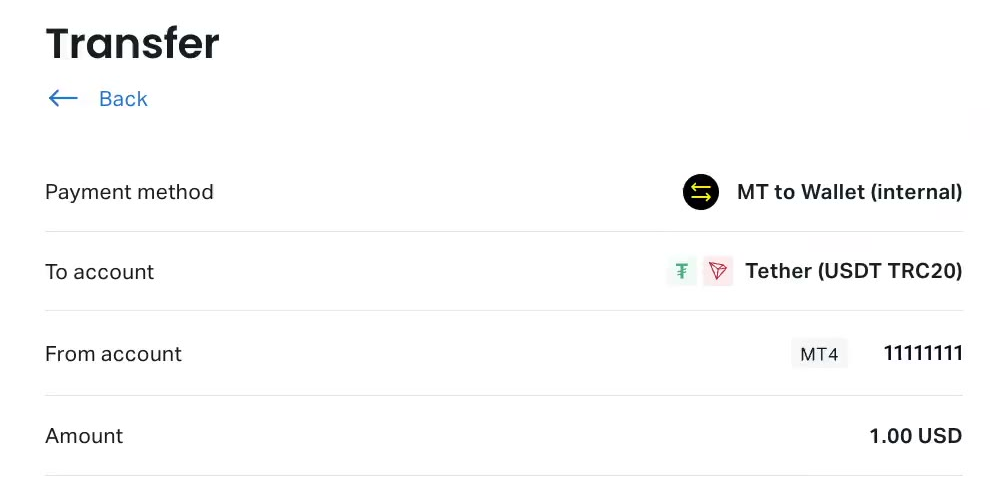
Figure 8. Historical demonstration screenshot; capture date unverified. The USDT example labels this stage “MT to Wallet (internal)”. Accounts and amounts are illustrative; this sequence is not independently verified or established as mandatory for all crypto withdrawals.
The account numbers and amounts in the internal-transfer demonstration are illustrative.
Check the external destination
Before confirming an on-chain withdrawal, compare these details with the receiving provider's current instructions:
- The asset being sent.
- The exact network selected.
- The destination address.
- Any required memo or additional identifier.
The example form is labelled USDT TRC20 and shows an external TRON address field and source wallet. Keep TRC20 and ERC20 distinct when comparing instructions. Two forms labelled USDT do not establish network support or interchangeability.
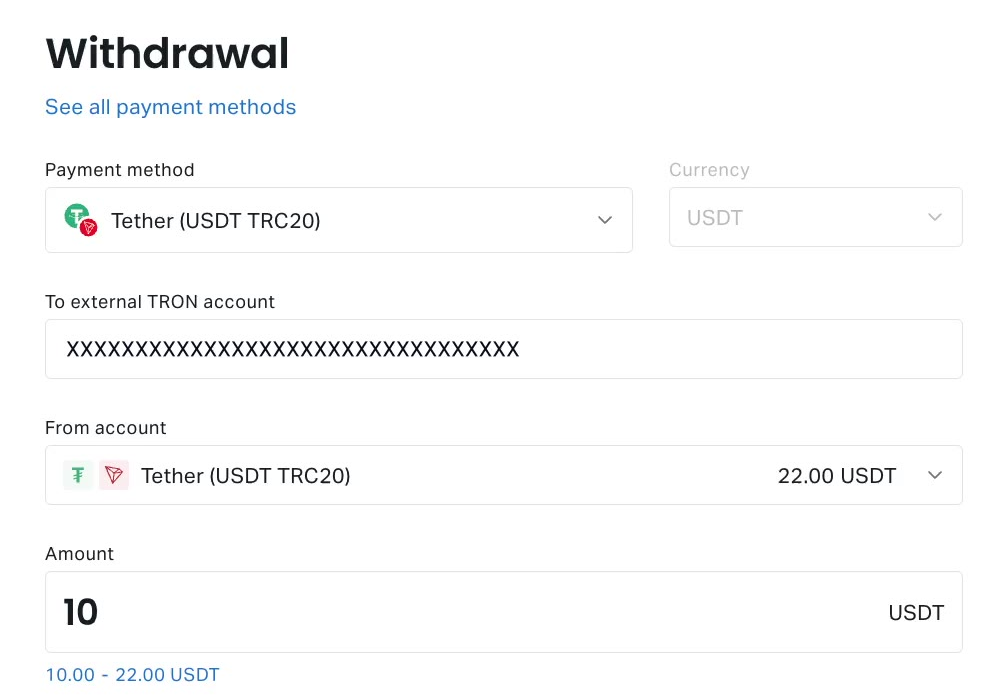
Figure 9. Historical demonstration screenshot; capture date unverified. The address is a placeholder and the displayed range is example-specific. Check the asset, exact network and destination against current receiving instructions and live route conditions.
The address is a placeholder, and the displayed range applies only to this example. Use the current receiving details and live route conditions. Save a blockchain transaction ID alongside the Exness reference only if one becomes available.
Troubleshoot a missing or unsuccessful withdrawal
First, check whether a request exists. In Transaction history, filter to withdrawals and open the relevant entry. Compare the elapsed time with the selected method's average and maximum expected processing times in your Personal Area. Exness instructs users to raise a support request from Transaction history if the maximum has passed and the funds are still missing. See Why is my withdrawal not reflecting?.
| What you see | What it means and what to do |
|---|
| No matching request or an error before submission | Save the exact error, time and screen where it occurred. Check history before retrying. If the issue persists, contact support with those details. A failure before submission may have no invoice ID. |
| Processing | Exness defines this as not yet complete. Inspect the timeline and compare elapsed time with the method's displayed maximum. If that maximum has passed and funds remain missing, use Get support. |
| Rejected | Exness defines this as canceled, with reasons varying. Read any displayed reason. Address an identified ownership, verification or receiving-detail issue before another attempt. Ask support if the reason is unclear. |
| Done, but no credit observed in the receiving account | Exness defines Done as completed on its platform. Compare the destination, amount, currency and references with the receiving provider's record. Use the transaction's support route and ask for help tracing the discrepancy before repeating the withdrawal. |
The status definitions and transaction-specific Get support option are documented in PA: Payments & wallets. These checks do not guarantee cancellation, acceleration, recovery or a particular support response time.
Check for a security-change restriction
A recent security-type change can temporarily disable withdrawals. Exness specifies a 24-hour restriction when the security type is changed via face scan. Some other user-initiated changes may trigger a restriction of up to 24 hours. Read the notice affecting your account and the security-type rules before treating the issue as a payment-provider delay.
This is general operational information, not a recommendation to trade. No withdrawal outcome or payment time is guaranteed.




 Exness